It would be easy, they said. It would take one-day, they said.
Oh Pinterest, you pretty little liar.
If you haven’t discovered #PinterestFails (check some out here), well then let me advise you that any Pinterest project should be approached very cautiously and plan for ample mistakes and re-dos.
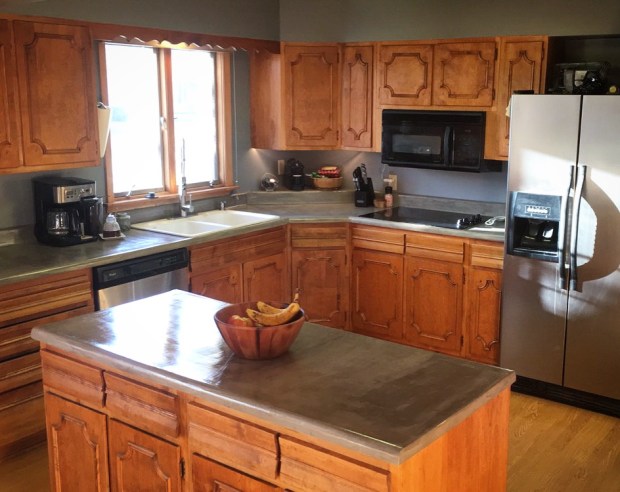
I’ve done what I can to preserve the character of my Mid-Century home while giving it modern updates where I can. This means putting up with the obscene amounts of golden oak wood paneling. It means appreciating the history of the red-brick recycled to make our two-sided, monstrous fireplace that acts as the dividing wall between our kitchen/dining room and the living room. It means I’ve learned to ignore popcorn ceilings (or the unspeakable ceiling tile in my kitchen).
So painting the cabinets was obviously not an option, especially with hubby displaying his distaste for painting ‘authentic, hard-wood, beautiful oak cabinets’. Mmk.
We call this look “well-loved,” as calling it “gross, grimy and worn-out” is too accurate.
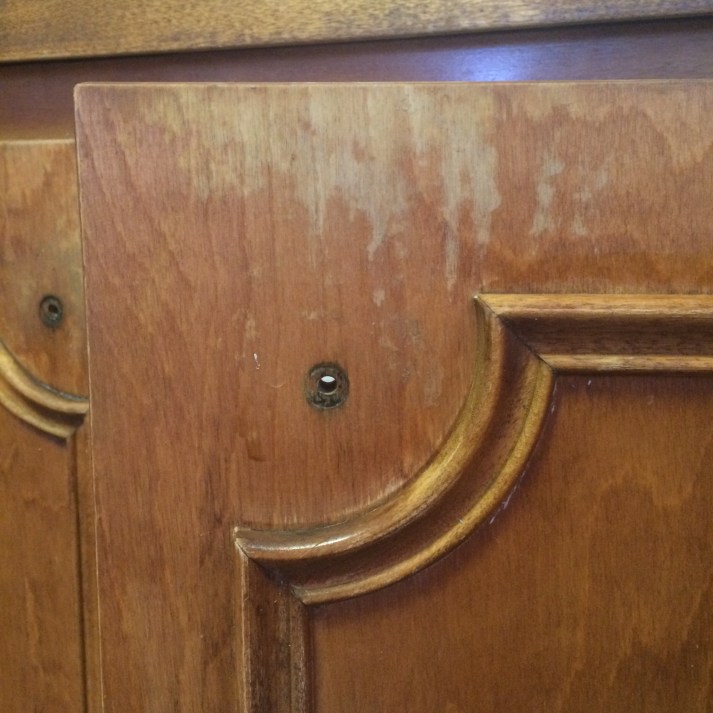
Pinterest (specifically, this great post by Young House Love) introduced me to MinWax PolyShades – which is a product I could theoretically apply over existing stain that had been lightly sanded down, and it would miraculously even out scratches and stains. BINGO! 80% of the cabinets were decent, but there were several with large water/wear stains around the knobs, and others that had just collected so much grime it stained the topcoat black (ew?)
Step 1: Remove hardware.
I used my hand-held power screwdriver given to me when I was a single woman as a new homeowner in Minneapolis. It may be tiny, but man it saves time!
Step 1a: Realize the hardware is disgusting.
So my knobs weren’t the coveted Oil-Rubbed Bronze as they appeared… they were coated in some gross goo that made them appear black. Maybe the finish was supposed to look like this, but after so many years it just sort of ‘melted’ and turned into a goopy, sticky black mess. Again… ew.
Step 1b: Clean the hardware.
I quickly referred back to my many Pinterest posts about refinishing furniture hardware. I ended up following this post from This Old House and soaked the knobs for several hours in my trusty crockpot with a bit of laundry detergent in water.
I also used Hubby’s toothbrush* to scrub it. The before/after is pretty shocking, isn’t it?!


*Don’t worry, I gave him a new one 🙂
Step 2: Sand Doors
Lucky for me, the doors have a raised detail piece in the middle of the door:
(Yes, that’s sarcasm)
So instead of being able to take a power sander to each door, I had the pleasure of hand-sanding each of the 27 doors. Since it was winter and a cool 25* outside, I made the decision to take my crafting to the Farm and utilize the heated shop – bonus it had an air compressor to blow off the sanding dust!
From the tutorial and my online research, all it would take was a light sanding. This took a few hours. I blew off the dust and finished wiping down with a tack cloth.

Left: Original Cabinet Door. Right: Sanded Cabinet Door. Top: Cutest Sidekick Ever (waiting for me to throw the ball)
Step 5: Touch-ups
There were some scratches and wear spots that were more prominent than others. For this I simply took a stain stick and colored it in, let it dry, and wiped it off. Seemed to help so I continued onward!
Step 6: Apply Stain
Like a good crafter, I went by the directions printed on the can rather than the blog post steps. I applied a nice even layer going with the grain, let it sit, then wiped it off with a rag. Look at the difference!

Left: New Top Coat Applied. Right: Sanded Door
Step 7: Let Dry
I let these sit overnight in the shop. To my horror, it was decided that the feed wagon should be parked in there overnight – so the next day I ran out there hoping that it didn’t cover my freshly finished doors weren’t now embedded with stinky dust particles.
There was a layer of dust, but thankfully (wait, something went RIGHT?) it wiped right off!
Step 8: Uh-Oh…
So I first noticed something wasn’t going exactly as planned in Step 6 when the directions on the can asked me to wipe off the excess, and the Young House Love I was following mentioned no such thing!
Then as it dried, the doors in good shape looked refreshed and glossier. But… the wear marks and scratches on the “well-loved” doors came right back to the surface.
Hmm…
After investigating, going over my steps, I discovered that I bought MinWax Stain, not PolyShades! This is bad for two reasons, (1) it’s a stain instead of a polyurithane blend, so it needed to be stripped completely of any old stain or paint to work; and (2) I had just wasted 8 hours of my life.
 vs
vs 
I frantically ran back up to my local Ace (“The Helpful Place”) where I bought the stain. They don’t carry PolyShades. So I went up to the DoIt Best lumberyard – again, they could order it for me but they didn’t carry it. The TruValue didn’t have it either.
60mi away from a Menards and I was out of luck, out of patience, and very much over this cabinet refinishing project. {I couldn’t even bring myself to take photos of them}
Discouraged, I left the doors laid out in my basement for weeks deliberating what to do (Re-sand and try PolyShades? Paint it? What color would I paint it? But I didn’t WANT painted cabinets! But dark painted cabinets would be cool…).
During this time, I ordered the supplies to start my concrete countertop project, and buried the thoughts of my failed cabinet staining in the deep corners of my mind.
Next: Part II: The Concrete Countertop Project